Bath-time 2 – In at the deep end!

A bit of feedback on my first outing with the sparklingly shiny new 6 litre ultrasonic cleaning bath, the highlights and lowdown’s. First off, here’s my simple bullet point list to get things going:

  • Be patient!
  • Fill with pre-heated plain water or whatever your preferred cleaner pre-mix is
  • Be prepared to help the cleaning process along with a soft brush etc
  • Let it do its thing in peace – wear earplugs or get out!

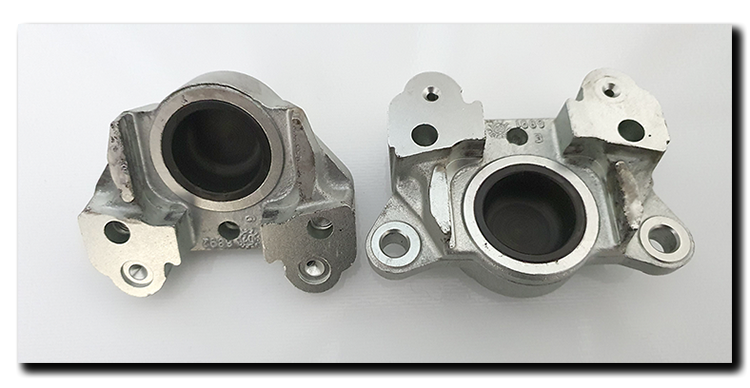
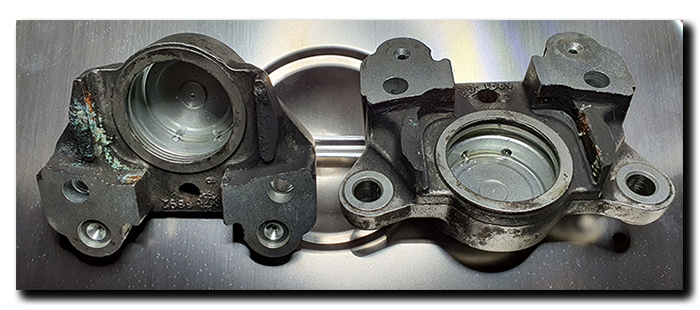
That’s it in a nutshell! YouTube video’s make it look like you’ll clean a 50 year old gunked up prop-shaft in two minutes – wrong! Not in a domestic cleaner you won’t. I used a mix of (so called) ultrasonic bath solution diluted 10:1 as specified. I made the mistake of filling the tank from cold believing the in-built ‘heater’ would do the business … well it does after a fashion, but oh so slowly. It would have taken about 2-3 hours to go from 13ºC to 50ºC – so I boiled the kettle in the end and made up a solution that was almost at the required temperature, so no wasted time waiting around! The old rear caliper was dug out of the parts store and stripped down. It came off the Capo back in January 2013 with about 40K miles on it and had simply been boxed and hidden away, unfortunately since it’s return to the UK it looks like damp had got in and caused some corrosion. Luckily this was confined to where the pads sit and nowhere else, thankfully the pistons and seals came apart beautifully.

So time for a quick pic, then into the bath!

Aprilia Caponord ETV1000 Rally-Raid rear caliper ultrasonic clean

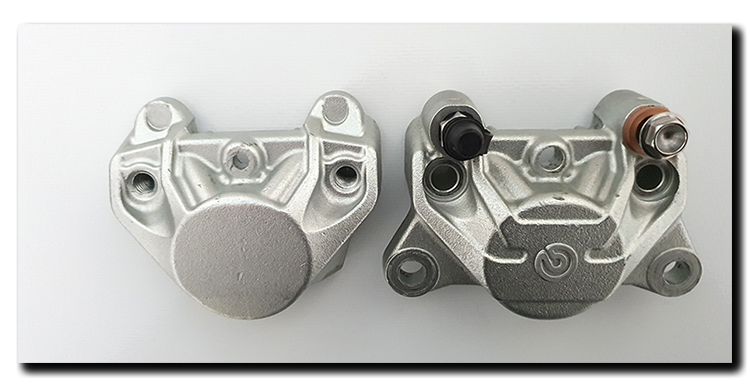
Initially I ran it for five minutes, unsure of how aggressive the solution/ultrasonic cleaning action would be. The solution was noticeably discoloured, but the calipers looked hardly touched. So in they went for another ten minutes. They looked much better this time … so in for another ten minutes. One half was now almost perfect, but the other needed two minutes of  TLC from a rotary brush, then they went back in for a final 10 minutes. Hence, be patient and be prepared to give the process a helping hand!

In the end, as the saying goes, all good things come to those who wait:

Aprilia Caponord ETV1000 Rally-Raid rear caliper ultrasonic clean

Aprilia Caponord ETV1000 Rally-Raid rear caliper ultrasonic clean

It only remains to mention my final bullet point. Initially I sat about 6ft(2m) away from the bath while it was running, the noise is not pleasant but bearable or so I thought. After about five minutes I started to feel a little nauseous. The lid was on and it was operating in a well ventilated area, so I didn’t think it was fumes from the cleaning solution, so figured it was exposure to sound I COULDN’T hear – it is an ultrasonic cleaner after all! In the end I left it to do its thing and sulked at the far end of the workshop and within a few minutes felt better again. The unit doesn’t come with any warnings beyond electrocution (lots of them!) … so be careful folks and don’t stay too close when it’s operating! 

Conclusion – I’m happy with the results bearing in mind that the caliper was well used and had suffered in storage. Now it is resplendent with new seals, a light wipe over with ACF50 and new home in a Zip bag and a better box. I’m really looking forward to using this cleaner on the triple bridge Brembo calipers and that may well be sooner rather than later, as Mr Postman has just this minute delivered the new brake lines and banjos from Venhill, wahoo!!!
Ognibene sprockets

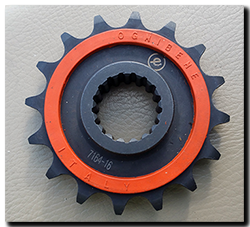
The first Ognibene (7164-16) 16 tooth front sprocket was fitted last April, since then its done over 18,000 miles and I’m happy to say, still has some life left in it. In comparison to the excellent Renthal sprockets that I’d used since the OEM one wore out, I have to say I’m very impressed. Yes they cost a couple of pounds more that the Renthal, but it has covered more miles. The Reynolds typically averaged (15,000 miles), making the Ognibene’s running cost slightly better pence-per-mile wise.

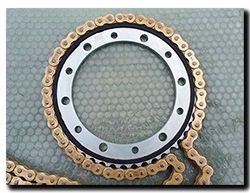
Now a matching set of front and rear (8098-45) sprockets are going on, along with a nice new gold/gold DID 525-112 ZVM-X chain. Aprilia Caponord ETV1000 Rally-Raid Ognibene front sprocket 7164-16The France Equipment rear sprocket (1683-45) I fitted last year is still looking pretty good, so it’ll go on the shelf as a part-worn spare.

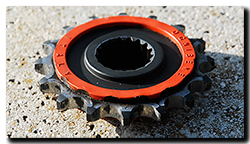
One thing that’s maybe worth mentioning about Ognibene sprockets is to be aware that the ‘silent’ bands will bed-in over the first few miles. Initially the chain side-plates ride up on the hard plastic bands before sinking in – changing the effective diameter of the chain’s run around the sprocket ……. this means your chain adjustment has to be monitored more carefully at the beginning Aprilia Caponord ETV1000 Rally-Raid Ognibene 8098-45 rear sprocket and DID ZVM-X chainand will no doubt require a couple of tweaks. Once everything beds-in I guess it’s business-as-usual with regards to the long intervals between adjustments that I like about the DID chain.

New chain and rear Ognibene sprocket courtesy of Motrag at a very competative price. Unfortunately they could only supply the 17 tooth front, not the 16 tooth…… that may change in time.

A pivotal moment

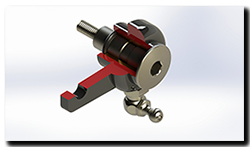
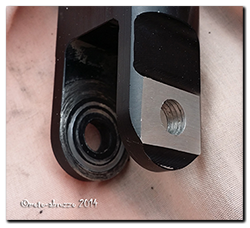
Aprilia Caponord ETV1000 & Rally-Raid rear brake lever pivot and grease nipple CAD graphicSometime last year I decided that 2015 was going to be the year that a whole bunch of parts were going to get cleaned up and recoated – engine/sump protection bars (especially the mounting brackets), headlamp guard and passenger foot peg hangers for a start.

The accessory parts seem to be made substantially cheaper than the bike parts themselves – stamped, pressed, bent and welded with a flash of cheap paint to top it off. All well and good for a couple of years, but the elements soon work their magic and the stuff begins to look jaded and rusty. No, if you want it to look good and last, you’ve got to pick up where the Aprilia contractor left off ….. Debur, remove weld spatter and radius any and all sharp edges you can find, THEN get a quality finish applied. That’s the plan anyway!

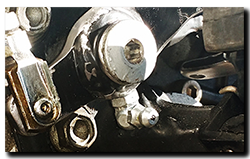
Aprilia Caponord ETV1000 & Rally-Raid rear brake pedal and grease nippleSo to kick off I took the spare rear brake lever and began to radius the sharp edges and smooth the lumpy stamped (or laser cut) edge … I have to say it was looking (and feeling) rather nice when I downed tools and wandered indoors for a brew.

It was while standing there aimlessly waiting for the kettle to boil that I thought about adding a grease nipple to the pivot – Aprilia have done a good job in making the bolt grooved to hold a reservoir of grease AND fitting two ‘O’-rings (OR114 – 1.78mm section / 11.11mm ID) to keep the grease in …… but a grease nipple would make packing the grease in and replacing it soooooo much easier!

In the end it only took 30 minutes ….. grinding a flat on the underside, drilling and tapping a 6mm hole and screwing in a 90° fitting. What do you think?

Speedo sensor thoughts

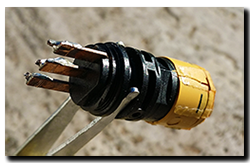
Aprilia Caponord ETV1000 Rally-Raid - Speedometer sensor Honeywell 1GP7001Having chipped away through almost 1/3 of the parts I got last week, I started on the speedo sensor …… unfortunately t’was deader than a Dodo. That presented the perfect opportunity not only to measure it for posterity – but to strip it apart and see exactly how it was constructed. In this case as you can see from the photograph, the sensor (Honeywell 1GP7001) is completely buggered and split at the sensor head …. marks in the body suggest it may have been water damage.

All this leads to the idea of a re-usable speedo sensor, that could be re-orientated for use not only on the Capo, but also the RSV and Tuono. Here’s a MK1 idea using the same Honeywell sensor (about £15/€20) and a few nice stainless screws for that macho-Meccanno look! The idea is that if the sensor subsequently fails, you simply unscrew the case top and solder in a new sensor – bingo! Back in business in 10 minutes flat. 🙂

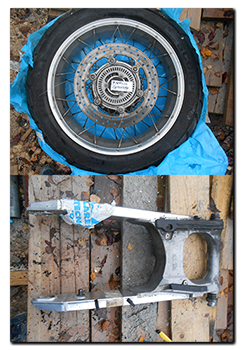
Aprilia Caponord ETV1000 Rally-Raid - 2005 rear wheel & swing armSo is it worthwhile following this up do you think, or should I resign it to – nice idea but ……?
And lastly, the chap in l’Aquila got back to me this week and offered me this pair of little beauties for €50 plus postage. 😀

Apparently the tyre is original and will require removal with dynamite or a thermic lance and the rim has a little scuff damage along the edge (about 5 o’clock in the pic), but I’m sure that can be taken out by someone more competent than I. I’ll have a nosey around the UK over winter and take the wheel back over with me in spring.

When the wheel arrives I’ll model it up, then look at various colour schemes that might (or might not!) complement the fudge/biscuit paint of the Raid. – not that I’ll ever get them done, more just a ‘what if I had dosh’ excercise unfortunately.

Rear suspension linkage – excess play

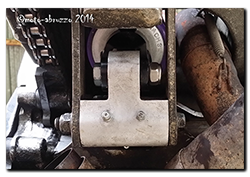
Aprilia Caponord ETV1000 Rally-Raid. Surface ground flat so a nut can be used to lock the bolt in placeLast year the Capo had an advisory on its MOT about play in the rear suspension – not much, just 4-5mm at the back wheel but enough to be picked up. The bearings, pins and seals had all been replaced only about 3-4K miles previously, so I doubted they were the problem and frankly I couldn’t feel anything when riding …. so the investigation was delayed until now.

With another 12K on top, the play hadn’t got any worse so I wasn’t too worried …. until I found the fault. The thread in the shock absorber lower mount was shot. Trying to remove the bolt simply unscrewed the thread the other way – bugger! The bolt is 10.9 high tensile into aluminium at a torque of 45nm which isn’t much, and I know I used a torque wrench to install it last time ……. hmmm.

Aprilia Caponord ETV1000 Rally-Raid. Cleaned linkage and nut/bolt in placeIn the end I carefully ground the thread ‘hump’ down to a nice flat surface and used a Nyloc nut as a replacement. Luckily the bolt is 47mm long and has a reasonable amount of spare thread on which to use a nut and sufficient clearance behind the drag-link. In an ideal world the thread should protrude 1-3 turns past the end of the nut, but in this case it sits flush. I’ll probably see if I can find a 48-50mm bolt to replace the existing one just to be absolutely sure it’s right, a flanged Nyloc nut wouldn’t hurt either … hell I might even take up wire locking again, who knows!

So everything else was cleaned, checked and re-greased. I can now certainly say that the group-buy linkage kit is in perfect condition after a total of approx. 16-17K miles. The play is gone and I just hope the MOT man appreciates my scrapped knuckles!

Hyperpro ho ho!

Aprilia Caponord ETV1000 Rally-Raid - Hyperpro rear springIf you do nothing else to your Capo this year, do this. Fit a Hyperpro spring, you won’t be sorry! The RR got this upgrade back in September and frankly it’s been smiles ever since. To top it off, Jan and I recently took the RR shopping … not in itself the most interesting of pastimes, but it’s how the Capo fared that was the real eye opener.

This was the first time I’d run two-up and with full luggage, 52Kg of luggage to be exact – and I didn’t have to adjust the pre-load. The bike took everything in its stride, including the obscene gale force winds that brewed up in the afternoon. It was also a real pleasure that the side stand could still be extended and retracted while fully loaded something that was impossible with the old spring, while using the center-stand doesn’t induce a popped hernia anymore. Absolutely fantastic! Excellent, balanced suspension with good ground clearance maintained …. can’t be bad for £80!

Hyperpro spring fitted – typical side stand clearance with the bike upright

Unloaded: 70mm    Rider only: 50mm    Rider+pillion+50Kg luggage: 20mm