Shoei announce the Neotec 3

If you look back at the history of the Shoei flip-front helmets, you notice a pattern – they release a new one every 6 to 7 years. Syncrotec, Multitec, Neotec, Neotec II and now the Neotec 3 – like clockwork! So with my Neotec II just over five years old earlier this year, I’d been looking online for info about a replacement. Disappointingly, other than speculation and fantasy, hard facts regarding a replacement by Shoei were none existent. And so the dilemma …. take a gamble and buy another Neotec II knowing it could be replaced imminently or simply wait, maybe well into next year. Choices, choices! 

Then yesterday, September 1st, out of the blue, Shoei released the Neotec 3! First I saw it pop up on sportsbikeshop.co.uk ….. then I went over to Shoei Europe website for a sanity check and afterwards throughout the day, watched in amazement as the online retailers updated websites and all manner of bloggers etc who had been trialling the new helmet were released from a non-disclosure embargo and began posting videos and reviews. All rather surreal!

From what I read and watched, I was mildly impressed overall. The changes seem subtle but an overall improvement from the II – but nothing ground breaking. Is it a ‘drop the II and grab a 3’ helmet …. not really. If however you’re replacing an end of life helmet, then it’s most definitely worth a look. For those moving from a II to a 3 the most annoying thing is that the Sena SRL-2 audio system won’t fit in the 3 – yet. I did read on one YouTube channel that an adapter kit will be available to make the SRL-2 fit the Neotec 3, but until that happens you are stuck with having to fork out even more money for the SRL-03 system.  But then again, I have to ask myself what percentage of Neotec owners went ahead and fitted the SRL-2 anyway?  My guess is the statisticians at Shoei have worked out the gains and losses across the markets already!

Helite e-Turtle2 air vest

Helite e-Turtle2 air vestToday a post on a new bit of kit in my wardrobe and how a couple of companies renew your faith in how retail should work.

First, the bit of kit …. a black Helite e-Turtle2 air vest with optional motorcycle sensor kit. In all honesty I’ve been dancing around the purchase of one of these safety garments for a couple of years, but only just bit the bullet after a rather sobering article in the press, where a Police rider heaps praise on one of these devices that saved him from serious injury after a rather ugly incident on the M25. Later I learned that 16 Police forces now use these devices along with many other agencies. I was sold, and the order was placed with sportsbikeshop.co.uk for the vest, sensor kit and a spare gas canister. Of course I don’t ever really want to use the first canister, let alone a second, but as the saying goes …. better to have one and not need it, than need it and not have one!


Helite e-Turtle2 air vest canister connectorsWithin a couple of days I was stood marvelling at my new purchase, more on which I’ll write later. But before that, I have to tell you the ‘good retail’ story! Being a curious sort of soul, I opened the spare canister and compared it to the canister fitted in the vest …. there was a difference. The electrical connector in the vest was a locking two-pin item, but on the spare canister it was a jack plug. Hmm … had I ordered the wrong one? Back to sportsbikeshop …. no, they only listed the one type of 100g canister. OK, over to the Helite website and slap me sideways, only the same canister with the jack plug is shown. Now I Helite e-Turtle2 air vest CO2 canisterwas stumped. So the next day I called Helite and received a massive apology as it turned out the new vests (Mk2?)  have the locking plug connector and a batch of spare canisters had only just been received, so no distributors had them yet! Now this could turn ugly … Helite could say get your distributor to sort it out and the distributor could argue they sold me what Helite say fits. But not in this case – both were fantastic, Helite sent Sportsbikeshop a batch of canisters and explained the issue, meanwhile Sportsbikeshop and I swapped a couple of emails and hey-presto a correct canister arrived this morning, just 48hrs after noticing the problem … no fuss, no arguing, just good old fashioned customer support – so thank you both, I’ll be buying from you again that’s for sure!

So with that little drama behind me and the rain cloud parting it was time to delve into the fascinating world of air vests. The setup of the vest is simple – pop it on charge with the supplied cable and when the vest LED changes from amber to green, you are good to go. Battery life is rated at up to 25hrs with the led turning amber when the vest has approx. 2hrs of life left. Charging takes approx. 5 – 7 hrs so they say. The charging cable supplied is a USB to power plug – an unusual cable and not one you’re likely to have kicking around, so I figure it should stay with the vest for safe keeping  … and there is a tiny pocket in the vest that’s not much use for anything more than a credit card or loose change but is ideal for storing the cable – sorted.

Next up then, the motorcycle sensor. First you need to pair this to the vest (dead easy) then fit it to the fork leg of your bike. Again,  very easy with various length straps and bits to fit a massive range of fork diameters. They say the sensor is good for up to 5 years and should be tested monthly using a little magnet supplied. Now my bike looks like a local bad boy wearing a tag on his ankle! Incidentally, the vest can be paired with up to 5 sensors if you have multiple bikes. Nice.

Now the air vest itself. Well the construction is first class and I would say the fit … unobtrusive and comfortable. I bought the XL-L, one for the more ‘portly’ rider …. both the XL and XL-L use a 100g canister while the smaller size vests us a 60g canister as their air bag volume is smaller. This does add a little more weight to the right-hand side of the vest, but once you’re wearing it the weight disappears. In use the vest is absolutely fine and doesn’t hinder my movement at all, you can even wear a rucksack with it, but there are a few caveats (loosen straps etc) otherwise you could be in a right pickle if it deploys! Turning the vest off and on is a simple quick-three-taps of the button. If the vest is powered up, but doesn’t move after 40 seconds,  it goes to sleep to conserve power. To wake it up, simply move the vest and you’re good to go again. The vest itself comes with a 2 year warranty which extends to 4 if you register it with Helite. They do recommend the vests are returned yearly or at most two yearly, if damaged or deployed more than 7 times for a service/inspection, which appears to cost approx. £75 plus p&p. 

So far so good. Putting aside what the vests purpose is for a moment (loads of YouTube videos available anyway) I just want to spend a moment thinking about some of the features which I think should or could be addressed in a Mk3 version to make the garment even better. In my eyes, they’ve missed a trick by not pairing the vest with an app. I know, everything nowadays has an app … but when well written they enhance the function of a device and I think the Turtle vest could greatly benefit from one. Take power for instance, the vest only uses LED/beeper to inform battery status – an app could show detailed info and predict when the vest will run out as well as being used to alert the rider. An app could also show electronics pack  and motorcycle sensor status and again, be used to alert the rider if either develops a fault. An app could also for example, be used to alert emergency services when a deployment is registered. And what about selective profiles road/race/off-road algorithms (like ECU maps) and the ability to detach from the motorcycle sensor if required. I’m sure there are many other things as well, but that’s just a few that come to mind. 

Also on the wish list – charging. The current 5 – 7 hours seems a long time, I’d like to see fast-charge functionality bring that down to 2 -3 hours if possible. Also the charging cable .. why a proprietary power connector when USB-C is now becoming the connector of choice? And while you’re at it, design the electronics it to accept charge while it’s functioning (currently it only does one or the other) then a power pack can be connected for those looooong days in the saddle! After all this, please don’t think I’m maligning the existing e-Turtle2 vest, I’m not, and I’m really glad I purchased it. I’m just thinking how a great product could be made better and even more user friendly in the future.  

Lastly I just want to mention  the differences (as I see them) between the standard Turtle2-lanyard deployed and the e-Turtle2. In essence the only difference appears to be the triggering method – one electronic and one that uses a lanyard attached to the bike. The latter requires the rider to move far enough away from the bike for the lanyard to separate from the vest, thus triggering the air bag deployment. The electronic vest relies on sensors and magical algorithms to do the same (and the bikes sensor if fitted) … bottom line, deployment should be quicker and reliable for different incident situations. 

NOCO NLP14 Lithium battery (fitted November 2022)

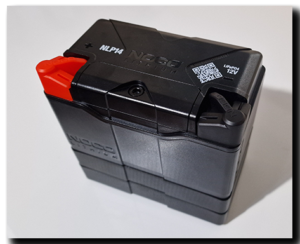
During its life the Capo has had two Lithium batteries – the original Shorai, fitted in October 2011 and  used for about 3 months, and now the NOCO NLP14. It’s fair to say, similar technologies, but also a decade of development different.

So what was the original problem with the Shorai? Very simple answer – temperature. Above an ambient 13-15C it would crank the Capo no problem, but cross below that particular Rubicon and it just stalled the starter motor until some heat was put into the battery, usually by running the headlights for a few minutes. Frankly, this was an absolute pain, hence swapping back to a good-old lead acid battery. It is this particular niggle that I have not come across yet with the NLP14 in my ZZR1200 even though we have had night-time temperatures dipping down to as low as -7C of late.

Installation

The NLP14 comes with some smashing cast/machined brass terminals that look lovely and offer a multitude of connection points – pretty and practical. But also too clever for their own good! On the Capo, Andy (Beasthonda) found that they caused the cables to sit far too close to the frame. So the terminal was modified by cutting approx. 4mm from the two sides and making the fixing hole into a slot to compensate. This allows the terminal to sit further ‘into’ the battery body and clear the Capo cables away from the subframe. 

An alternative fix is to buy a couple of brass screw-on terminals from Motobatt. The MB-TERM-003 fitted just perfect and although they don’t look anywhere near as pretty as the NOCO terminals, they do the job just fine without cutting and drilling. They are made of 4mm thick brass and also have two extra attachment points – the upper being standard for the Capo. You can see from the pics, that there is a cover between the terminals held by one screw … this needs to be removed to fit the battery into the Capo. It’s simply ‘bodywork’ and just makes the battery mimic the shape of a few different battery types.  In the end the battery took a only a few minutes to replace and is an almost exact fit for the Capo battery box (no padding required!) and the cables are well clear of the frame as well. 

Performance

Simple …. It does exactly what it claims on the website. Both the Capo and the ZZR batteries have performed perfectly through winter – neither giving a moments problem. In fact, recently, the ZZR spent an extended time away and after a few weeks the tracker warned of a low battery voltage. Annoying, but to be expected with a tracker and camera system drawing parasitic voltage for such an extended period. By the time I got to it, the voltage was well down for a Lithium battery and I had taken my jump starter pack along as I expected to need it. In the end, even with the voltage reading only 12.18V I was gobsmacked that it fired up when I hit the starter button out of childish curiosity! But of course, the ZZR is a lovely inline-4 …. would the battery still crank the quirky-Capo in the same predicament? Truthfully …….. I don’t think I would have tried, we’ve all heard the camp-fire tales of dashboards going south and other electrical gremlins coming to play when poor-voltage fairy is on hand.  

Bella Italia ….. my old friend!

Giulianova September 2022

Well it has certainly been a while since I last posted on here, so maybe now is as good a time as any to pick up where I left off. As you can imagine, the last twelve months have seen many changes and a lot of things that needed to be ticked off the list of life …. the most recent being a run back home to Italy after almost four years. 2020’s Covid lockdown didn’t help of course and then after Jan passed away last year I just couldn’t face the trip alone. But eventually the clouds parted and the Caponord got to do what it does best, run faultlessly for almost 4,000 miles over a couple of weeks! This then is a potted summary of what stuff worked and what could be improved for next time.

The fact is, lots has changed since I last travelled over – all my riding gear is different for one. The Capo has had a fair amount of maintenance/refurb during those years and even my cookware of choice had changed! Gear wise, I’m now using Rukka/Daytona and of course the venerable Shoei Neotec 2 with Senna intercom. All performed faultlessly especially in some prolonged and very heavy rain in Northern Italy/Switzerland. Expensive gear yes, but worth every penny in my book. Oh and I can’t leave out the surprise of the trip … EDZ Merino wool socks! Those and the Daytona boots kept my feet comfy warm and dry like never before, absolutely fantastic.

Cookware wise, the old Trangia stayed in the loft and I used the much smaller and neater gas cooker that I got from Manuel over at motrag.com ….. as a one-person unit it worked fine for me. Hot coffee on the go in the smaller mug and and a re-heated pasta dish in the bigger one was just about perfect after a long run. Simple, compact and a doddle to use, it’ll stay the cooker of choice for now. 

One concern on the trip was the Capo’s battery. Throughout, the voltmeter showed charging ranging from 13.9 – 14.2V depending on load, but less than an hour after shut-down the battery standing voltage would fall to 12.4 – 12.6V and that isn’t great. Ultimately it never actually gave me any trouble, but it was waving the imminent flag of failure, so time for replacement. As soon as I was back in Blighty, I ordered a NOCO NLP-14 LiFePO4 battery. I have exactly the same one on a ZZR1200 and Andy (BeastHonda) has one on his Caponord ….. short and simple, they work. For the ZZR, it was a straight swap, but for the Capo, the terminals have to be modified slightly – no biggie and I’ll post more on that later.

NOCO NLP14 battery

Other than the battery, the Capo performed brilliantly, returning an average of 46mpg using the heavily modified Catfish 50429 map/airbox/snorkel and even managed 52mpg through the Swiss alps. I can live with that! The Mitas 07+ tyres worked well and wore predictably, however they were a tad skittish on wet over-banding …. but maybe I’m being picky when the Capo is fully loaded, leaning and doing 80mph at the same time! Throughout the ride I used the cheaper E10 fuel as I wasn’t going to be keeping it in the tank for long, but as the mileage to Calais ticked away, I changed back to E5. Once off the boat at Dover I changed again to Shell Supreme 99+ …. ethanol free. Expensive yes, but so much more friendly to the Capo fuel system.

Finally I rolled into a dark and cold Oxford driveway at 1:30 in the morning with the Capo showing 170,053 miles in the dashboard. The arthritis in my knees is playing up and my backside has had enough of today …. but through all that I just feel so immensely proud of the Capo. So what next? A well earned clean and service in the short-term and then a full rebuild and line replacement for the rear brake, just to bring it back up to scratch and looking as fresh as the front brakes. I should also get around to replacing the fuel sender unit .. it stopped reading properly a year or two ago and I have all the parts to hand, but never found the time/enthusiasm. I think the Capo has earned it.  After that? Maybe it’s time to head North for a change, who knows.

Tragic loss

Today I mourn the passing of my soulmate, best friend and wife of almost 30 years – Janet. She fought so bravely for two years against cancer, but was finally taken from us yesterday after a sudden and unexpected downturn. Family were at her side at the end as she passed peacefully. Today the pillion seat is empty and the intercom silent …. for over thirty years we travelled together on two wheels. Goodnight my beloved sweetheart.

Clutch hose upgrade and Innovv K3 Dual camera dashcam

Aprilia Caponord ETV1000 Rally-Raid Venhill Powerhose Plus stainless steel clutch Job 1

I managed to get a couple more Capo jobs out of the way recently. Firstly, replacing the clutch line for a nice new Venhill version to match the shiny ones on the front brakes. The hose required uses:

  • 1x 90º Banjo
  • 1x 45º Banjo
  • 1x Venhill Powerhose Plus hydraulic line – 1125mm

It fitted perfectly, and while I was changing the line I also changed the banjo bolts and bleed screw for matching stainless steel units to complete the look. I have to admit, these are not cheap lines …. but I love the fit and flexibility with interchangeable ends. So for that I’m willing to overlook the extra hit on the wallet!

Job 2

Aprilia Caponord ETV1000 Rally-Raid Innovv K3 Dual HD camera systemSecondly, I bit the bullet on an Innovv K3 dual camera system. As some may remember, I’ve previously tried the original K1 and the much improved K2. Unfortunately, the K1 DVR unit died after 12 months and the K2 turned itself into a brick with a failed firmware update. To be fair to the K2, it was leagues ahead of the K1 and (when it worked) was a truly fit-and-forget system. What went wrong I have no idea, I followed the update process to the letter and even had a few email exchanges with Rock Liu from Innovv, but they dried up when it looked like the unit was unrecoverable. I was lucky enough that the K1 and K2 had been supplied FOC, so nothing lost. This time however, it’s my own outlay. It’ll either be ‘third time lucky’ or ‘a fool and his money are soon parted’!

Certainly my first impressions on opening the box are:

  • Slightly smaller DVR with no buttons
  • Nice moulded waterproof connectors
  • Comprehensive fitting kit with stainless fasteners and anodised aluminium brackets instead of plastic/steel
  • Cameras physically identical to the K2 units but with different internals
  • Addition of an external microphone
  • Waterproof remote button for saving files and taking photographs as well as LED’s showing recording/GPS/WiFi status

Looking through the technical specification, it looks like the main upgrades over the K2 are:

  • Dual core processor for better image processing
  • Different camera internals ( Sony IMX291 LQR sensor)

Installation was of course, very similar to the K2. The power module connects directly to the battery positive and negative terminals and the yellow trigger wire went to the loom I still had in place that tapped into the rear lights/brake lights. As soon as the side/head lights are turned on there is a 10 second delay before the unit begins recording and when switched off, a 25 second delay before powering down the unit. The front camera comes with a 2m lead which is fine, but the rear has a 1.5m lead which for the Capo is way overkill. I only needed about 0.4m and hiding the rest away was a real pain.

To install the cameras I used two 15mm rubber lined stainless steel ‘P’ clips – the front one on the Aprilia headlight guard and the rear on the pannier frame. The included mounting kit parts fitted to these clamps just fine and it only took a couple of minutes to get a nice neat install and great picture being recorded! Oh but one bit of advice ….. the supplied screws don’t use any washers, so once happy with the install, I went back and put a dab of thread-lock on all the screws just to be safe.


Missed it

Aprilia Caponord ETV1000 Rally-Raid 160,000 miles
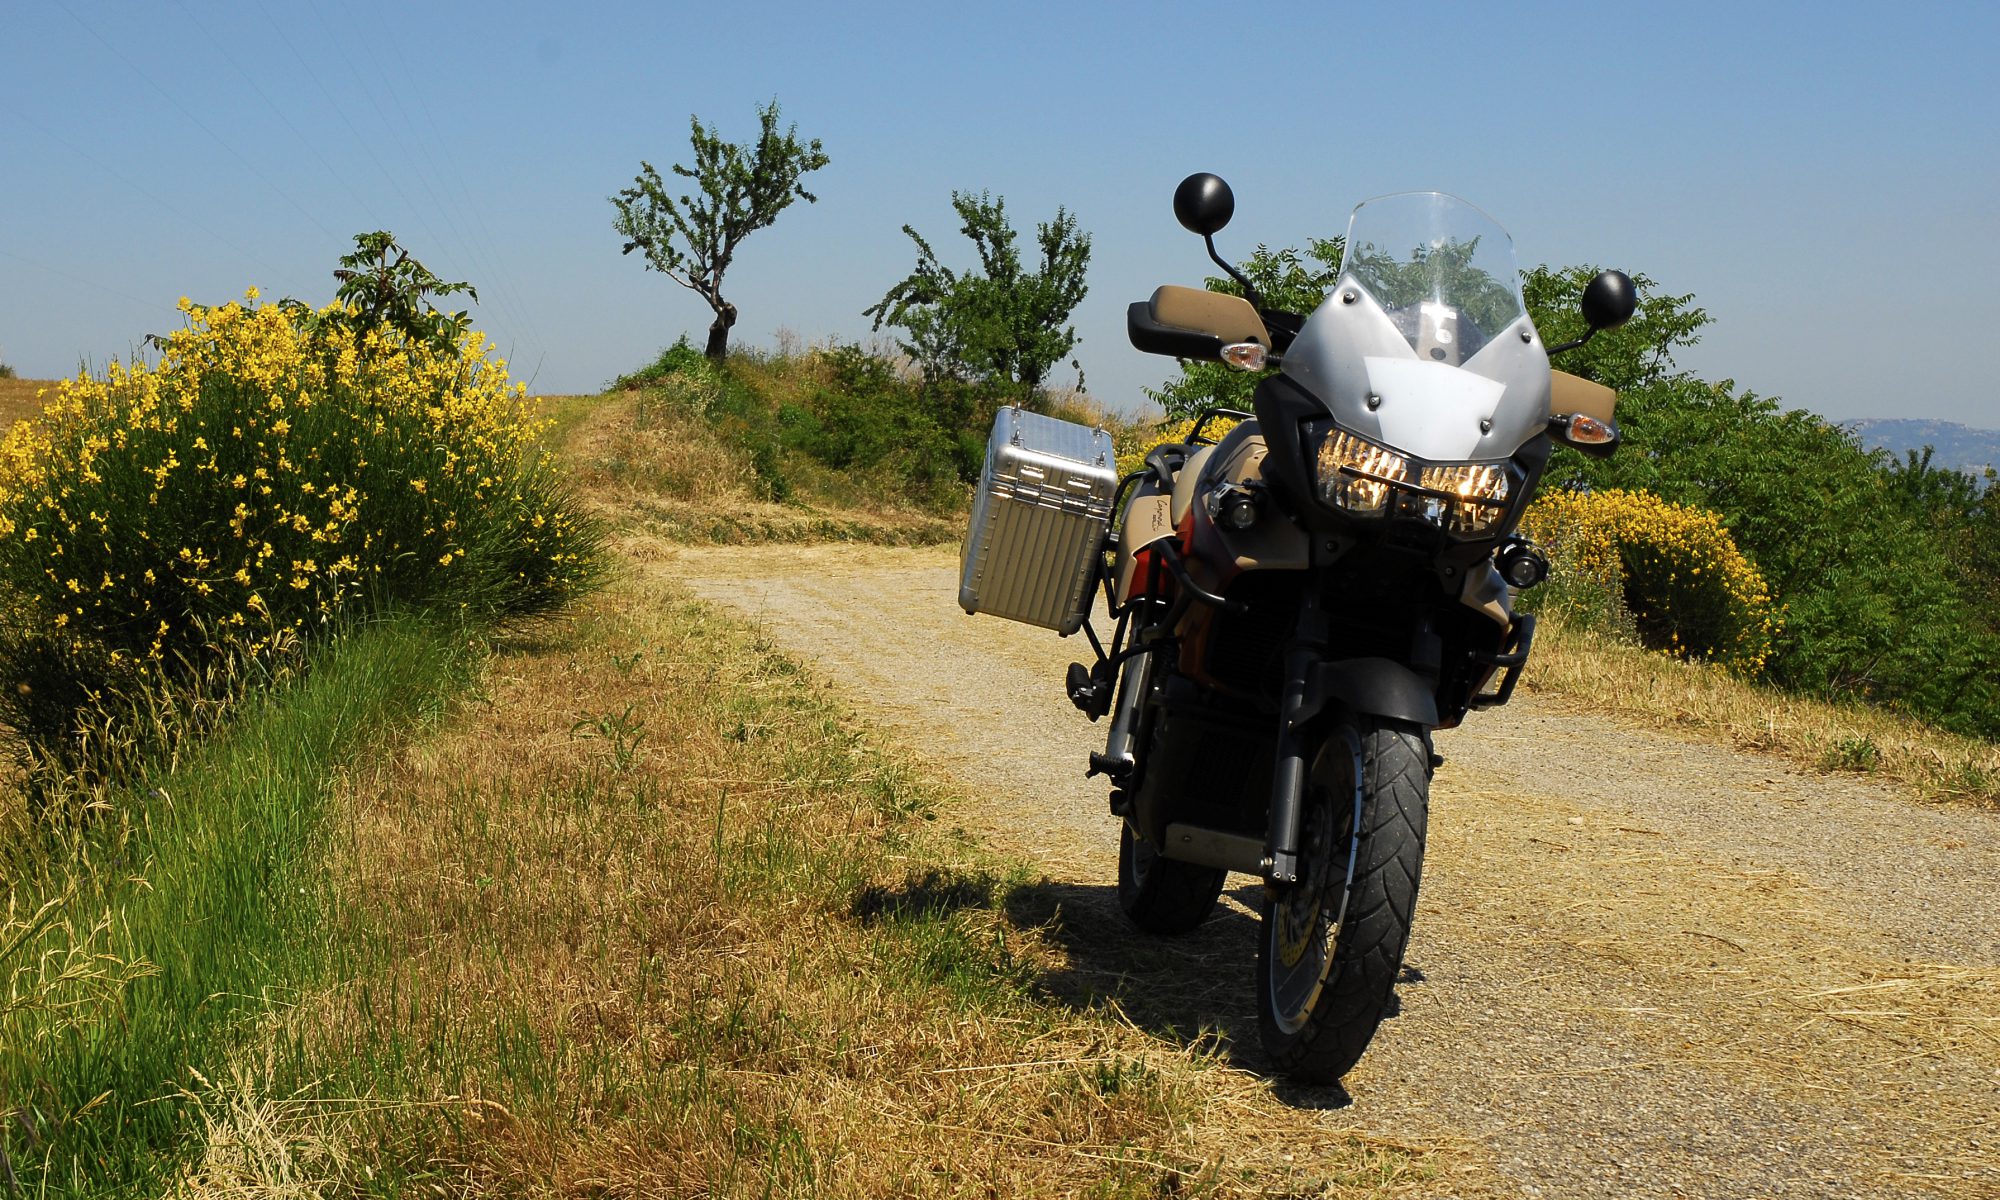
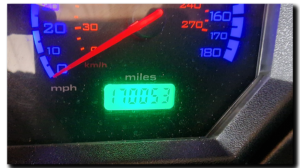
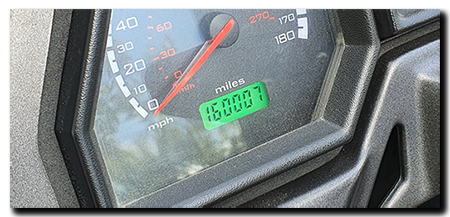
And so the moment came and went without fanfare after a year of lockdown, no trips back and forth to home in Italy, no big holiday rides here in the UK. A year where mileage clocked up painfully slowly, the Capo sitting idle way more than doing what it does best – eat miles and promote smiles!

In the end, it was on a big fat roundabout on the outskirts of Oxford that it rolled through its 160,000th mile. No one stopped and applauded, no one  cared. No fanfare, no brass band. Even I was too busy navigating the mindless Wombles I shared the road with to notice the moment. Only as I accelerated away on the dual carriageway did I see the display roll over to 160,002, the aftermath of what should have been a jolly nice photo opportunity. Bugger.

Fuel Injectors & RST Throttle body

Aprilia Caponord ETV1000 Rally-Raid RST Futura throttle body rebuild
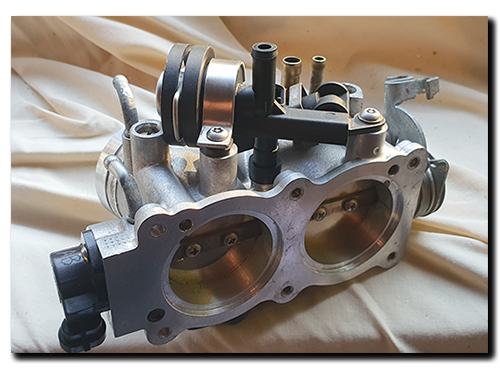
Sometime way-back-when, I bought a used set of throttle bodies off an RTS Futura (51mm v Caponord 47mm) with the view of doing some tuning/comparison work on the Raid with the 3D printed hybrid velocity stacks (51mm diameter but Caponord height). What really happened though was far less glamourous and only involved a sturdy box and a shelf! But about a month ago I dug them out again and realised that I pretty much had all the ingredients required to do a full clean and rebuild. I had stainless steel 4x10mm and 5x12mm Torx screws on the shelf as well as all necessary seals. The ultrasonic cleaning bath would do the brunt of the work and I could send the injectors away for professional cleaning at a reasonable cost.Aprilia Caponord ETV1000 Rally-Raid RST Futura throttle body rebuild

And so, with a plan to hand, apart it came. First the injectors were sent away for cleaning. The turn-around was quick and the total cost was about £30 including P&P. Thankfully both injectors got a clean bill of health. Next, the throttle body and associated parts went into the ultrasonic cleaning bath. I had bought the 6L version …. but when you take into account the smaller basket inside, the usable capacity is probably something more like 4 – 5L … just enough luckily, for the throttle bodies. If I was in the market for another one, I’d definitely opt for the 10L or maybe even try to stretch to the 15L for good measure.Aprilia Caponord ETV1000 Rally-Raid RST Futura throttle body rebuild

It was amazing the amount of debris that came out of them … in the end they looked almost brand new again! The rebuild was very straight forward with all new ‘O’-rings and screws used. Pleased? Yes I think so. They are refurbished and ready for action which is the important thing. The only downside is that some of the mild-steel components are still showing a patina of rust. It would have been nice to re-plate them to give them that as-new look as well. For now I’ve cleaned off what I can and coated the parts for protection, but one day I’d like to have a crack at home plating … zinc, nickel or passivate of some sort might be interesting.  Aprilia Caponord ETV1000 Rally-Raid RST Futura throttle body rebuild

Parts used:

2x   4x10mm Stainless Steel Torx screws

4x  5x12mm Stainless Steel Torx screws

4x  10mm OD 2mm section Viton O-rings

2x  14.1mm OD 2.4mm section Viton O-rings

2x  BS203 O-rings

1x  BS008 O-ring

Just throwing it out there ……. If I were to offer these out as a bagged kit, would anyone be interested?

Replacement stainless steel fasteners

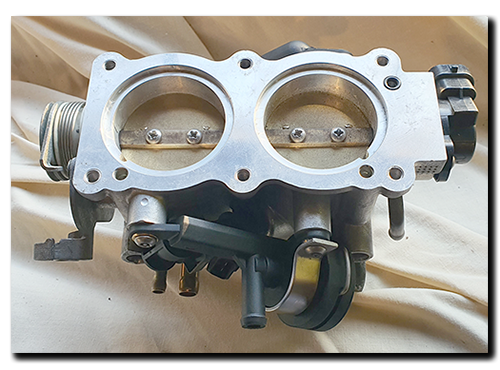
I really like fasteners, I hate rusty, corroded or damaged fasteners. There it is out in the open, plain and simple. I think there’s something tragic about lots of hard work going into an assembly, only for those old jaded screws/nuts/bolts/washers to go back into holding it together. On the other hand I’m not a fan of those OTT ‘custom fasteners’ – pike nuts etc or gaudy anodised fasters in any colour of the rainbow. For me, they are way overkill. What I want is an upgrade from the manufacturers items that were no doubt chosen with cost in mind. I like something that looks a little more up-market, in a material that is mechanically safe for the task in hand – safety has to override looks every time! They are there to do a job and complement the work that went into the parts they represent. 

What am I upgrading then?

So as part of the brake line upgrade, I’ve swapped out the stainless steel cap heads I had holding the hose supports to the fork leg with lovely Racebolt flanged hex head ones that better reflect the items originally fitted by Aprilia. A waste of money? Quite likely. Hell the cap head bolts did the job and were also in stainless steel, but they always looked like an obvious swap – a generic item – these new bolts look like Aprilia MIGHT have fitted them if build cost wasn’t so high on the list. In the end, these things are personal and one owners pike nut is another owner duct tape … they both hold things together I guess!

Ultimately I invested in a few little upgrades … the fork axle pinch bolts went from home-drilled cap-head to lovely ‘race spec’ (drilled for lock wiring!) flange bolts and the brake/clutch master cylinder cap heads were replaced for the the none-drilled versions. Last but not least, the rear axle adjuster bolts have been upgraded to stainless steel versions.

Conclusion

After putting a fair amount and time and effort into brake lines and calipers etc. it only seemed logical to add the finishing touches by upgrading certain fasteners to ones similar (but better!) to those fitted by the manufacturer. It’s not a cheap exercise by any stretch, but it does remind me of the old saying;

Don’t spoil the ship for a ha’p’orth of tar

SPOILER ALERT – It doesn’t have anything to do with ships! Ship was dialect for sheep. The meaning is, don’t lose a good sheep by not putting a protective layer of tar on wounds or sores to prevent infection by flies etc. Over the years folk have taken ‘ship’ literally and besides, it sounds far more grandiose to think that a cheap amount of tar could cause the loss of a very expensive ship! Here endeth the lesson … 🙂

New lines, new seals, new fittings, will it ever end?

Aprilia Caponord ETV1000 Rally-Raid Venhill Power Plus brake lines and stainless steel banjo boltsWell this little job just got a whole lot more involved and costly! The idea of having lovely clean and refreshed  calipers made me think about the old banjo bolts (M10x1) and bleed screws (M8x1.25) … OK, so new stainless ones were ordered from Racebolt, that’s fine. Then it got me thinking about the old tarnished hydraulic hose ends … sigh … OK, so new hoses as well then! 

I went for the ‘Powerhose Plus’ range of hoses and fittings from Venhill down in Surry. I chose ‘carbon’ grey (smoked translucent sheath that shows the hose weave below) with all fittings in stainless steel. I really like these hoses because the end fittings can be rotated – thereby reducing twist in the hose and allowing the hose to sit naturally. This is something I hate with other swaged hoses. With that type, I have nearly always had to induce an amount of twist in the hose to get one banjo to fit the caliper or reservoir. Fair to say, I like neat hoses (and wires!) and I have a smattering of OCD about me when it comes to symmetry … both left and right hoses will HAVE to mirror each other!

Aprilia Caponord ETV1000 Rally-Raid front brake hose lengthsThe standard hose assembly is  a single hose from the reservoir to a T-piece just below the lower fork clamp, from there a single hose down to each caliper. To replicate this was actually more expensive than using two individual lines from the brake master cylinder. So that’s what I went with – A double banjo bolt at the reservoir and two lines to the calipers using 2 x 45º banjos at the reservoir and 2 x straight banjos at the calipers. For the Rally-Raid the Venhill right hand line (as sat on the bike) is 950mm long and the left hand line is 1,100mm, these will need to be slightly shorter for the standard Caponord. The important point is that the lines plus fittings have to be long enough so that no part of the line, banjo-to-banjo is under tension when the forks are fully extended.

The lines came with three hose support grommets each, and I ended up removing one as it was not needed. Both lines use one grommet located within the existing support grommet that fits in the plastic tray below the headstock, the second is used within the P-clip bracket on the mudguard fixing screws, so two per line (see pics below). The third I used to help buffer the left hand line up at the handlebars … hopefully I’ll get around to designing and printing a 3D bracket to make this support look more ‘factory’ and finally the third support on the right hand line was removed.

So with the lines sorted it was time for the calipers. The left one was removed, stripped and cleaned with Gtechniq W6 Iron and general fallout remover … a rather pungent and powerful liquid that does what it says – strips off 95% of the dirt in one go. Use in a well ventilated place with gloves and goggles, this is nasty stuff! After that, the pistons/seals were stripped out and everything zapped in the ultrasonic bath for a couple of 20 minute cycles until totally clean. Once dry, everything was put back together with new seals, O’ring and bolts (2x 40mm, 1x 35mm). Once everything was back together it was time to bolt the caliper back to the fork leg (50Nm) and have a nice warm brew before starting all over again with the right one.

Conclusion

In all fairness, I couldn’t get over how good the old seals were after 115K+ miles and almost 20 years. The pistons and springs cleaned up beautifully and looked almost new and the anodising inside the bores was hardly marked – totally amaze-balls when I think how badly some Japanese calipers fair after only a couple of winters. I honestly think it is all down to the coating on the pistons and the anodising of the casing that make the difference. As for the cleaning process … I got there in the end! Brake calipers are probably the worst thing to clean on any bike and unfortunately there is no getting away from good old elbow grease … well that and a really aggressive cleaner made for the job! The ultrasonic bath put the icing on the cake, but in all honesty wasn’t strictly necessary, but did remove a little more dirt and added  extra sparkle.

Below is a selection of pics showing hoses and before/after shots of the calipers along with a couple of shots that highlight the kind of crap the Capo put up with for 10 years on a certain Italian road …